Route planning workflow
When started, all completed orders are displayed. These are all transactions that have already been completed via the POS system (invoice created or similar).
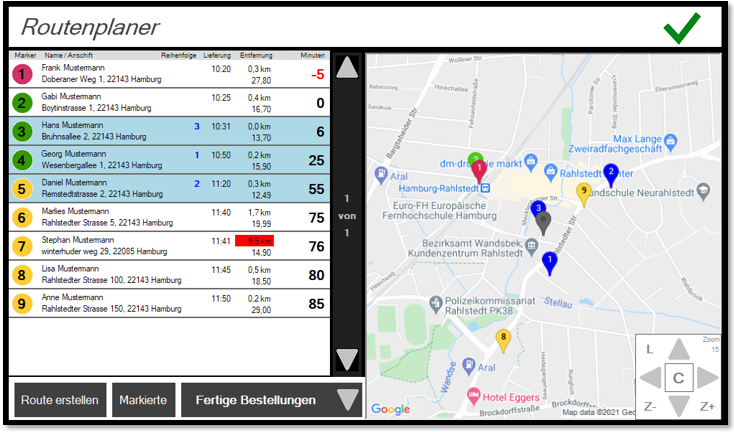
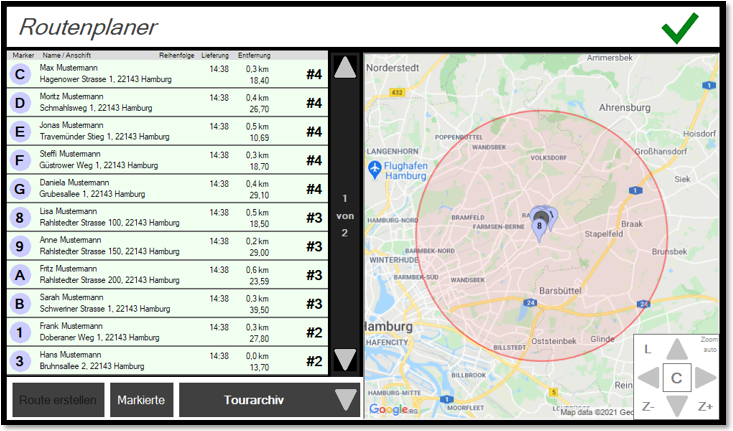
The list view

The address, planned delivery times, distances and document totals are displayed.
On the right, the minutes to the planned delivery time are displayed, which, if exceeded, are continued in red letters and with a negative sign. The entry is then also displayed with a marker with a red background. Otherwise the markers are green up to the set lead time, beyond that they have a yellow background.

In the map view, all orders visible on the screen are displayed with markers.

If you have set up a delivery area, this will be displayed as a circle (note: this circle display is for orientation purposes only and has no effect on the acceptance of orders from a specific area).
At the bottom right of the map there is a control field for zooming and scrolling the map. With Z+ Z- in the map, the view can be enlarged and reduced. C (Clear) automatically resets the zoom level and map centre to . The section of the map can be scrolled using the arrows. L alternately switches the display of the delivery area on or off. Red marked km entries are outside the delivery area. The UP and DOWN arrows scroll through 11 entries page by page. The numbering of the entries is from 1-9 and A-Z (limited to this for compatibility with Google).
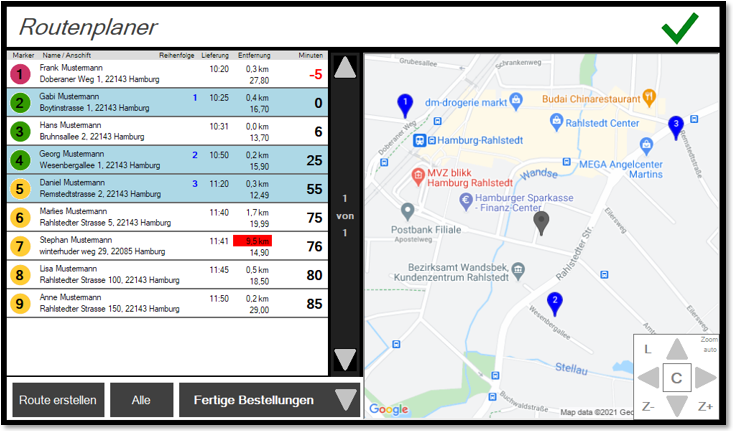
Individual markers can be marked by clicking on them and collected for a route.
The order of your selection will cause the entries to be displayed in that order. Based on this sequence, you also determined the calculation of the route and thus ultimately the routing of your delivery. Selected markers are highlighted in blue on the map.
If entries are marked, a route can be calculated from them. Pay attention to intelligent route guidance, as no automatic optimisation is available for this. The button Marked is a toggle that switches between Marked and All. This allows you to determine whether only the markers of the entries you have marked are displayed on the map or all of them. Example only marked entries as markers:
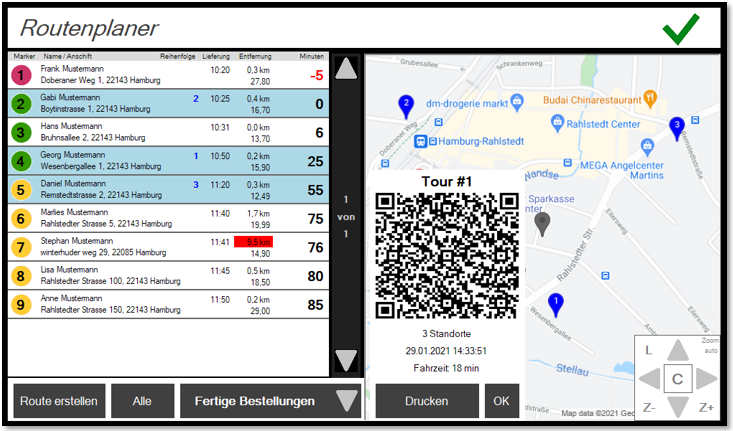
Create route...
Use the button Create route to create a Google Maps link with a list of waypoints that can be output as a QR code. This QR code can then be scanned directly by the driver and generates the finished route in Google Maps from the starting point, via all waypoints back to the starting point.
The journey time of the route is already calculated.
Those who use "Android Auto" receive the route directly on the navigation device in the car.
If the driver uses vehicles with their own navigation system, we recommend devices that are compatible with Android Auto or Apple CarPlay.
With Print you print the tour receipt and the display on the monitor is closed. Press OK to close the display on the monitor without printing.
Tours confirmed with Print or OK are then hidden from the list and are only available in the archive.
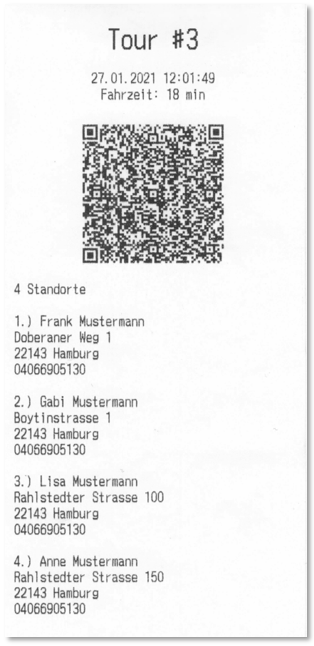
Example of a QR-Code tour receipt...
Function selection for finished orders
The button Finished orders opens a menu with the following selection options:
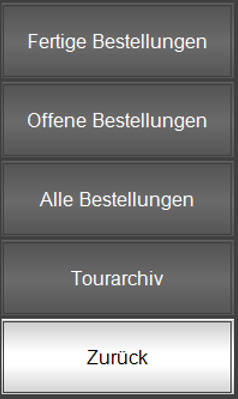
Open and All Orders...
If you select Open orders you will see the orders that have not yet been accepted and also transactions that are still open ( open table ).
All orders displays open and completed orders. Here, open processes are highlighted in light yellow to indicate that the items have not yet been produced:

A planned route becomes an archived tour after printing the tour receipt or confirming with OK. The button Tourarchiv switches the view to the archive. Tours that have already been created are displayed here chronologically backwards (most recent tours first).
For orientation, this tour view is highlighted in light green. The time displayed is the creation time of the route/tour. By selecting a tour, all entries are marked and only their markers are displayed on the map. The route can no longer be changed here.
Print route again...
You can reprint the route from the archive. The journey time is recalculated based on the current traffic situation.

In the tour archive, route plans can be cancelled, for example in order to be "re-routed" via the route planner interface. To do this, select an entry and press Cancel. Afterwards, the orders are available again for route planning.

Back to the overarching topic: Route planning