TSE installation
The installation of the TSE consists of several steps.
- Physical installation of the TSE
- Assignment and activation of the TSE
If you are currently supplied with a TSE, you can keep it until the planned hotfix for April 2020, or already do the Physical Installation.
Planning and warning for TSE positions
Especially if you use several devices and TSEs, you must remember to keep them accessible. Switching off individual units that control a TSE will otherwise lead to a TSE failure for other units that also use this TSE.
In general, configurations that are not made at the main unit but at the cash registers are more prone to error in large system landscapes, the more communication channels there are. Example:
-
You book with your mobile device -> stick is plugged into the server -> signature and processing on the same device.
-
You book with your mobile device Stick not at the server, but at the slave device -> Handset communicates with server -> Server must communicate with slave device -> Slave device gives feedback -> Now server can process.
Physical installation of the TSE
You will receive each TSE in the form of a USB stick in a bag (clear or similar) and a red Hypersoft seal:


On and in the bag there are white stickers with barcode that you can optionally use. In this example, the certificate is shown until month 6 in 2025. If you activate the TSE Stick before month 6 in 2020 (as scheduled), the five-year certificate period starts to run, regardless of the activation, otherwise the certificate will expire at the latest in month 6 in 2025.
The barcode on the white stickers corresponds to the external number behind the code on the outside of the stick and corresponds (in part) to the designation in the device management. The stick carries digital numbers that are independent of this. Later, a connection between the internal number and the external number is established by activating the TSE stick in the device management. If you know which devices you want to use the TSE(s) on, plug them permanently into a free USB port on the device. Taken Swissbit USB stick (no scale):

No free USB port...
If all USB ports are already in use, please contact our support or your /vendor. Peripheral devices can be removed or changed to IP connection.
If you are forced to use USB hubs (see also USB Remarks), try not to plug the TSE into the hub but into a direct USB port that has become free.
For special purposes, it is possible to procure and use TSEs in the form of micro SDs (no Hypersoft standard). Contact your Hypersoft Vendor for urgent needs.
Plug the TSE Stick directly into the unit (any example):

Our recommendation is to protect the USB stick with a seal, which is why we enclose this for you. The seal signals which of the plugs is the TSE and prevents careless removal or confusion. Example of how to affix the seal:

Attach the seal so that the TSE Stick cannot be removed with it. To make the seal work, press the seal firmly against the case (but do not lever too hard on the USB flash drive to avoid damaging the connector).
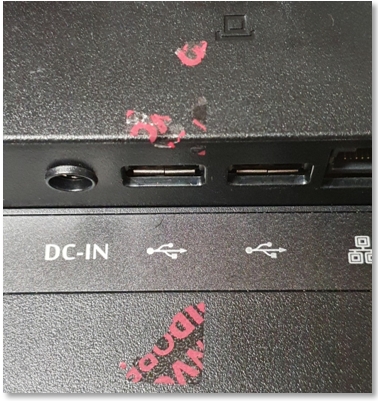
If someone removes the TSE stick, a residue remains from the seal as an indication of wilful removal:
The data, which is stored in the TSE for the time being, will be transferred by Hypersoft to the Hypersoft long-term archive as soon as this service is available. Thus, the data would be preserved even if the TSE stick was lost or defective.
Further topics: Set up TSE
Back to the overarching topic: KassenSichV TSE safety device