Keyboard layout
There are two different types of keys on a POS keyboard:
- function keys
- item keys
Function keys can be assigned cash register functions or a function macro (with up to eight functions). Item keys can be used as a direct item key or as an item selection key (with up to 8 items).
If you want to display more than one item with one keystroke, we recommend using Noteworthy information on product groupsrather than "layering" several items. Product groups have the advantage that new items are automatically displayed in them, while the superimposed items remain static. Within individual items, you can make further queries that can also post further items. These possibilities are described in Using Components and Queries and others.
Split keyboard between items and functions
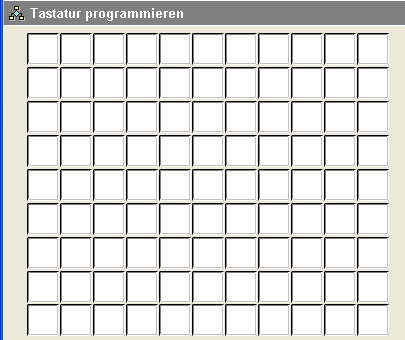
Start the stations program and open the station details of the desired terminal. Make sure the screen size and keyboard are selected correctly. Then confirm the button Program keyboard.

When you start a new keyboard, all keys are displayed as function keys (white):
Now there are two things to plan. First you determine which keys are always visible with Lock Columns. Then determine which keys are to be used as PLU keys.
Further topics: Station management direct jump options
For example, select the column 1-7 to lock to be able to display items in the columns 8-11. To do this, use the Lock columns command from the button bar:

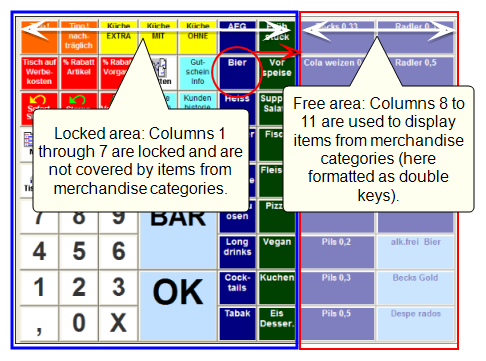
If you have four rows of items, as shown here, make sure that you do not use more items in the product group than there are free keys for them. Although you can use Next within the area as an emergency solution to scroll to the second page, this is not as clear and quick to use as one and the same level for all articles.
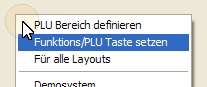
In the start layout of the checkout mode, it can generally be helpful to offer the most frequently used items directly for booking in this way. You can determine which part of the keyboard is to be used for such PLU keys. As keys are either PLU keys or function keys, the remaining area is automatically defined for function keys. In addition, you have the option of switching individual keys to PLU keys or function keys. To do this, click with the right mouse button in a free area of the dialogue so that the command Set function/PLU key appears. Select any free key whose property is to be reversed accordingly:
If you want to assign PLU keys to an entire area, select DefinePLU area from the PLU menu. In the list of the cash register functions now three keys appear which you take up with double click and place in the area.

Place the first PLU on the first button of the area. Second PLU to the next and last PLU to the last key of the range.
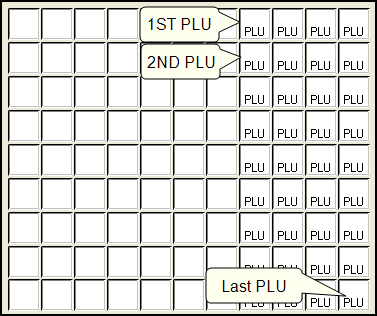
Exit the dialogue once with OKbefore you continue working here (the order of the item keys is arbitrary and has no further effect).
Back to the overarching topic: Set up Hypersoft POS checkout mode