Using the MRP Monitor
Example of the MRP monitor in the site:
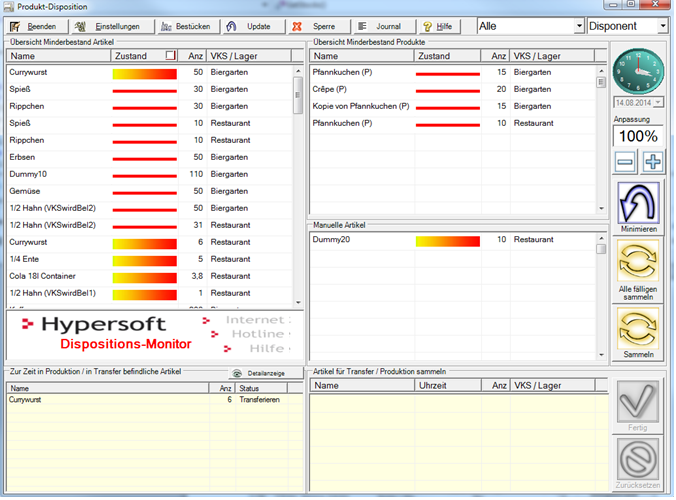
Colored elements in lists inform about the need for items. Depending on the setting, the delivery instructions are created automatically or manually.
Structure and Elements of the Monitor
The lists are used according to the settings in the master data and represent a workflow:

The MRP list contains all items whose stock levels have fallen short of the stock specifications. The status bar represents the status of the stock in relation to the stock defaults and the current stock. The higher the item requirement, the longer the bar of the status bar is displayed.
A target stock of 110 pieces and a minimum stock of 10. When the (mostly theoretical) stock has reached 60 pieces, the bar rises to 50%. As soon as the minimum stock level is fallen below, the bar starts flashing - the item is due for subsequent delivery in the sense of disposition. In semi-automatic or fully automatic mode, due items are collected and a delivery instruction is issued after the set collection period has expired.
Display of a due item and an item whose target stock level has fallen short of, but not yet its minimum stock level.

If an item can no longer be stocked internally, but must first be ordered from the supplier, then this malfunction (you have too little goods!) is represented by a deactivated bar. This fault can only be rectified by posting the item and recalculating it. Plan your stock carefully to avoid this situation.
Display of an item Cola 0.2 with the status Order with supplier necessary (malfunction).

In the product MRPlist, all products (items that you produce yourself) appear whose target stock has been fallen short of.
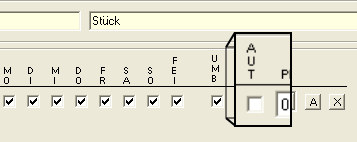
In the manual MRP list, all items appear whose target stock has been fallen short of, but whose status has been set to Manual in the stock specifications (Aut deactivated). Allows you to manage items that require (perhaps conductive) manual intervention to be loaded for any reason.
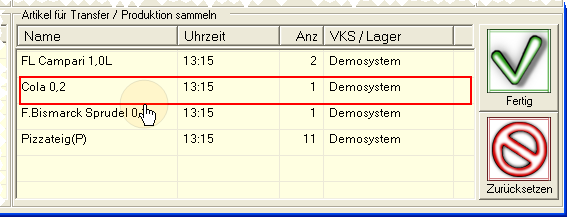
All collected items appear in the bottom right corner of the collectionlist.
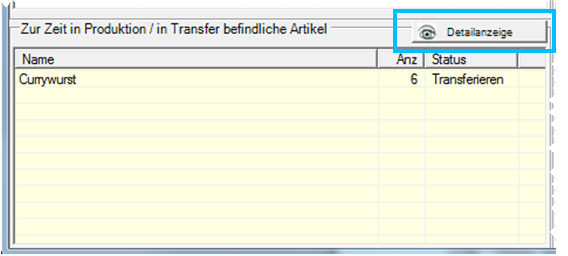
The production, transfer and order list shows the items currently in transfer / production. In the fully automatic mode the items are automatically accepted, so that there is then no status (or theoretical storage location) in transfer.
- The MRP monitor displays items that are due.
- You collect these items by selecting and clicking on Collect in the Collection List or you click on All Due Collectsto transfer all due items to the Collection List.
- With Finished, the collected items are printed as delivery instructions.
Adapting the delivery instructions
You can adjust the number of proposed delivery instructions before they are printed out in the MRP monitor.
Double-click on the item whose number you want to change. The previously displayed collective list is replaced by elements for adjusting the delivery instructions.
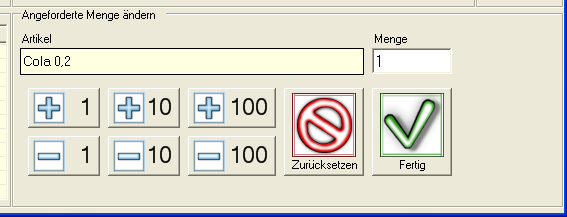
With the keys + 1 to 100 you can increase the number, with the keys - 1 to 100 you can decrease it accordingly.
When you have completed the fitting, exit it with Doneto return to the Collect List view.
Reset discards your change and returns to the collection list.
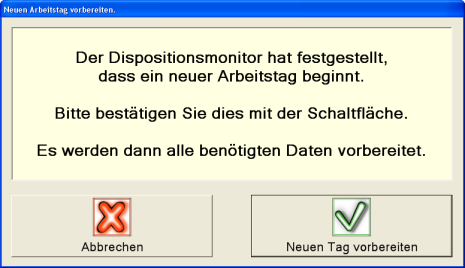
Automatically change or confirm day
The MRP monitor must know when a new day starts in order to correctly adhere to the stock specifications or to carry out the calculations again. Any information displayed from the previous day is discarded and recalculated, or only relevant information is retained.
With a setting, you can choose whether the MRP monitor recognizes the new workday using the TTA (theoretical day-end closing - setting in the master information) or whether you want to start a new day manually.
If the MRP monitor does not automatically start a new day and is restarted after the TTA, you are asked whether the new day should be started.
Mode of the Disposition Monitor
The MRP monitor basically has three modes:
- materials requirements planner
- Semi-automatic (recommended)
- fully automatic

By selecting items from the disposition lists and pressing the Collect button, you fill the collection list. Complete the collection with Done and create the delivery instructions.
Internal deliveries must be confirmed by the recipients in MRP controller mode (if this has not been deactivated in the settings). After creating the delivery instruction and before confirming receipt, the relevant items are in In Transferstatus.
The MRP monitor collects due items and creates delivery instructions according to intervals and specifications.
Internal deliveries must be activated in the same way as in MRP controller mode.
The fully automatic mode corresponds to the semi-automatic mode, but the delivery instructions are posted immediately to the destination without the status In Transfer and therefore do not have to be confirmed.
At the end of the collection period, the items are booked and the working instructions are produced in the form of a printout - we call this the delivery instructions. The delivery instructions are therefore subdivided according to the collection period. You can also specify whether the delivery instruction is to be subdivided for each delivering point of sale and the selected printers. You can assign a different printer for each source storage location. Different printers lead to an additional distribution of the delivery instructions.
The printer control of the cash stations is used for printing. In this regard, all participating POS stations must be in cashier mode in order to be able to print. All functions for alternative printers can also be used.
With the button test print you can check your settings. You can also set up a Windows printer in the printer controller to print to it. Note that the printer is controlled from the POS system. The corresponding cash registers must run in cashier mode in order to be able to print. Alternatively, Hypersoft can be used to start individual programs to control the printers using special settings.
equipping
The section Filling, Filling and Reducing is an extra chapter:
Mounting, Filling and Reducing
The Update function
The stocks and calculations of the MRP monitor take place according to the set intervals. If you want an immediate calculation, you can press the Update button. The timer for the inventory service remains unconsidered and must be waited for additionally.
Lock Disposition Monitor or Settings
If the MRP monitor is set up in such a way that access to it is to be secured, you can lock it for unauthorized access with the Lock button.
You can specify the type of logon in the settings. Press Lock and access will be blocked. You will be asked to use your key or appropriate medium to regain access. As long as the monitor is locked, it continues to work according to the setting. To regain access to work with it, you must replace the key or card that was used to lock it.
The start parameter NOSETTINGS prevents the settings from being called.
All actions of the MRP monitor are displayed, such as, placement, replenishment, or reduction. The calculated quantities take into account transfer units and maximum stocks, which can result in "unexpected" quantities. The column Ori. Quantity shows the actual "original shortage" for your orientation.

As a mode there are disposer, refill, load and reduce, as a status order and transfer. Individual fields can be used as filters with a right click. Thus, the display can be quickly limited to one day / item.
The journal is saved on a monthly basis, the journal of the selected month is deleted with Delete Journal.
The detail display is started from the transfer area.
Disposer area to check the actual state of the items....
In the upper area, items are listed whose demand was calculated using the Fill function. These items can be used by the Order Center in order proposals.
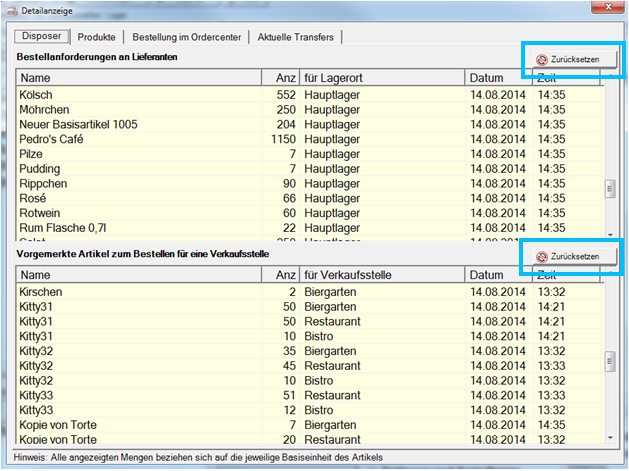
In the lower area there are the items which should be requested with the function Load, but could not be delivered due to stock shortages. The items are therefore considered as "reserved", so that they have to be ordered later.
The Fill storage locations function then takes these flagged entries into account when calculating further order quantities.
Both areas can be reset because the state is "temporary". The values can be recalculated at any time by reloading /refilling. Alternatively, individual entries can also be deleted with the right mouse button.
Display of the products that are currently to be produced by the production monitor...

Orders in the order centre...

Display of all ordered items, both manual orders and quantities automatically calculated from order proposals.
Furthermore, all items are displayed that have already been converted into purchase requisitions but have not yet been ordered. These are also taken into account by the MRP monitor as already ordered.
Current transfers...

During the transfers all items are indicated, which wait for the respective transfer acceptance. This means that their stock is already debited at the storage location, but not yet posted at the destination. The corresponding amount is not at a storage location but in the state "In Transfer"
There should therefore be no obsolete/orphaned transfers (transfer acceptance forgotten or the settings for the respective point of sale were/is wrong). Such open transfer assumptions are undefined by their condition and should be processed/removed.
Selection of points of sale for viewing
In the upper right area you can set the points of sale to be used for viewing.
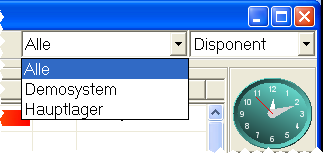
If you select All (selection: Standard), all points of sale are taken into account in materials planning. Alternatively, you can switch individual points of sale to restrict the display of the MRP monitor to the items in question.
Time and date of the MRP monitor
The time and date of the MRP monitor is the current system time. The stock specifications are then used as the basis for item requirements.
For example, if you want to stock a business event according to an expectation that the current stock specifications do not meet, you can select the required stock specifications here by setting the date and time and then trigger the stocking.
Use the Plus and Minus buttons to reduce or increase the stock settings.

The setting 100% corresponds to the stored target and maximum stock. Both values are temporarily changed with this setting in order to influence the reactions of the disposition monitor according to their specifications.
For example, you can increase the value to determine which items may become due soon to optimally prepare for a rush. You can also reduce the values in order to only have to deliver urgently needed items. The settings for the priority of the stock specifications have priority.
Further topics:
Touchscreen-optimized programs
Back to the overarching topic: disposition monitor