Print item

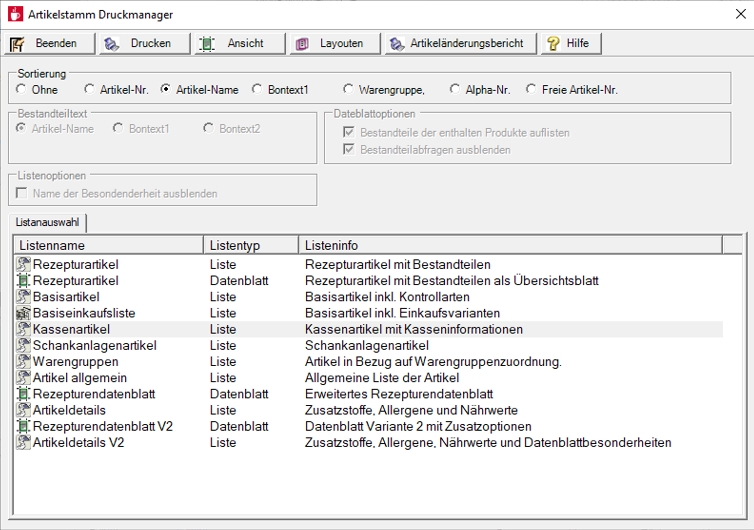
With the button Print you reach the item master printmanager.

The item master print manager is used to output the item lists. The scope of the lists depends on the restriction of the previously set search. This means that exactly those items are output that were previously displayed under All items in the list. With the selection in the Sorting area you determine the order of the output.
The item change report provides you with all information about changes in the item master and who made these changes. When you select this function, you will be taken to the Stock Report (only this one report of the Stock Reporter can be accessed via this button).
Since the printout of the item master always contains the saved data, output after new entries is prevented until the changes have been saved in the item master.
After changes in the item master, you should at least check settings for prices and VAT. If you use a central system with locations and different settings, you should run the check per location. Especially if you work with price groups. The master data report should then also be generated per location. This way you will receive a report about your cash items and VAT.
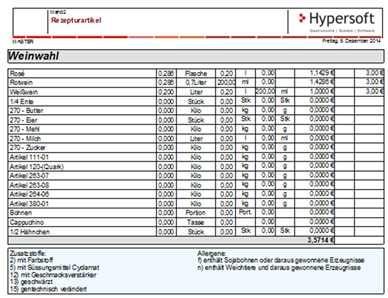
This is a data sheet with information from the item master. You can customise the data sheet with the layouter. Different item images are available.
When printing, you can choose whether the item text, receipt text 1 or receipt text 2 is to be used for the component texts.


At the end is a table listing the additives and allergens.
Further topics: Register of additives and allergens
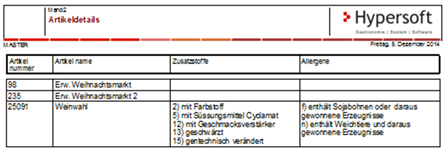
This list shows you the ingredients and allergens.
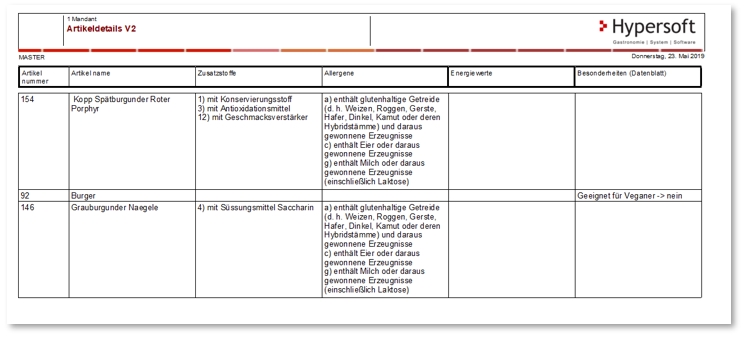
Variant 2 can contain special features that you Special featuresdefine in the
Printing and outputting lists
Use the Print button to print the report or data to a printer. The print selection dialog
The View (Preview)
In the view you get a preview in which you can navigate and print. The view or preview
The layout function...
Hypersoft Suite enables you to make extensive arbitrary adjustments to most lists and evaluations with the program List & Label Layouter . This is started with the Layout button next to the Print button. The layouter should only be used by experienced users or after training. You can also instruct us with adjustments at any time. Further information can be found at The List & Label Designer.
The components of the recipes can also be exported: Export: Ingredient lists and recipes
This function is for 3rd party connections and special application areas. As a rule, you do not need the internal IDs.
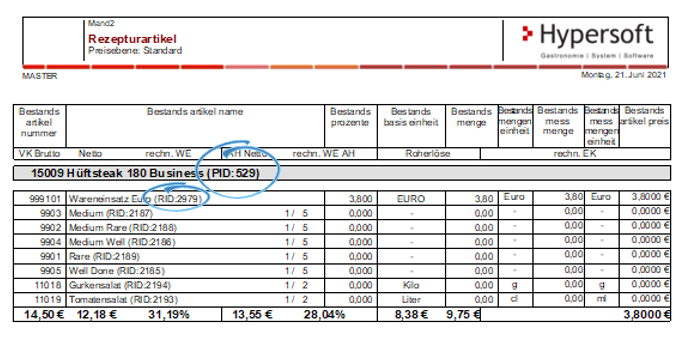
The listing of the internal database IDs on the lists or data sheets can be activated with the option switch in the advanced options: List database IDs in the name (PID / RID)

PID = Is the unique ProductID under which the item, both recipes and basic items, are booked in the POS system.
RID = Is the unique RezID under which a query item is posted in the POS system.
All printouts append the PID or RID in brackets to the item names, receipt texts or components concerned.
Example recipe item list...
There is a barcode manager to print labels. However, you can also print certain labels directly from the item master:
For printing a packaging barcode:

To print the item barcodes...

In both cases, the application is started to print labels and the item(s) is/are listed there. It is best to use a special Hypersoft label printer for this purpose.

Further topics: Barcode Manager
Back to the overarching topic: Basic knowledge 3: Special knowledge