Configure side panel

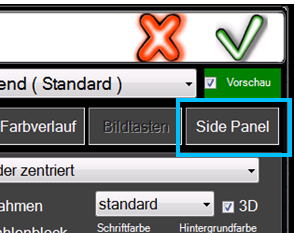
The side panel extends the POS checkout mode laterally to support multimedia format monitors. The Side Panel tab can only be set in POS Designer if you are logged on to the cash register as an operator with Manager status.

The use of pictures in the classic area of the keyboard is described in the chapter Using Images on Buttons.
Best practice: Using Hypersoft Sidepanel effectively
The Hypersoft Sidepanel is an optional extension for monitors in HD format and offers you exactly what counts in day-to-day business: more space, a better overview and noticeably faster operation.
The additional panel expands your work surface and relieves the classic main screen.
More structure, fewer paths
In practice, function and process buttons are typically placed in the side panel, e.g:
Closing functions
Cancellation and correction functions
Service and special functions
This leaves the central screen area free and can be fully utilised for article and product group buttons.
The result:
clearer surfaces
less switching
faster bookings
lower error rate
This equalisation of the user interface pays off immediately, especially during periods of high turnover.
Optimised for speed and ergonomics
The side panel follows a simple principle:
Everything that is rarely changed is placed in the side panel - everything that is sold remains in focus.
This shortens operating paths and helps new employees find their way around more quickly.
Standardised design with ready-made image templates
For optimum utilisation, we provide you with predefined image templates for buttons.
You can download and use these directly to:
to create a uniform appearance
Clearly label functions
increase recognisability
This means that the side panel is not only functionally but also visually consistent in your POS layout.
Conclusion
The Hypersoft Sidepanel is a simple but extremely effective extension:
More space, better structure and faster processes - without complicating the workflow.
A real plus for all companies that value efficiency, clarity and professional work.
Image templates
To optimise the use of the side panel, we have created image templates for the buttons that you can download.

Collection Side Panel Templates.Zip Download...
Once downloaded to your main unit, paste these files into the cashier stations directory (C:\)Hypers-!\Image. This is best done at your main cash register or your server, because from there the Terminal Commander can distribute the files to all cash register stations the next time the system is started.
If you work with locations, you must install the files in each location.
Below we show you 3 different side panel layouts as a template.
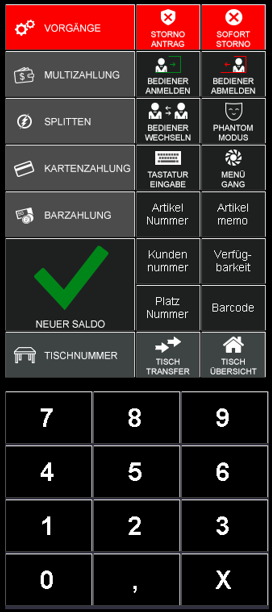
• Layout Standard = Full Service
• Layout 1 = Quickservice
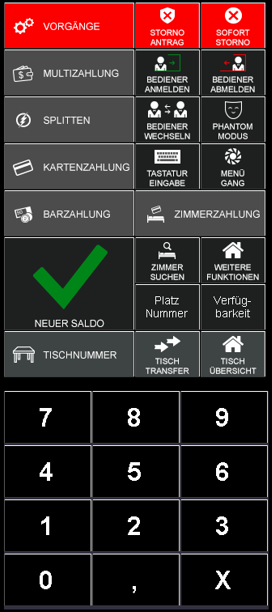
• Layout 2 = Full service with hotel (PMS) connection
Use these POS Designer settings: Select Scale button images and filled, the settings that are best for you.

The pictures and following layouts are intended for the side panel with number pad and the grid set 4 columns and 8 lines.
If you use a different grid, it may be necessary to adjust the images.

Example Standard Layout...

Example Quick-Service with focus on payment...

Example hotel restaurant...

Use consistent colours on your POS interface and note the order of the colours to sort the items in the checkout as you wish. Now round off your checkout interface with a visually attractive table plan .
Layout Functions
In the standard system, you use a layout for the sidepanel. For extensive POS systems you can even use several layout templates to provide different sidepanels. Different layouts are offered for this purpose:

Layouts can be copied, saved and pasted again.
Side Panel Setup

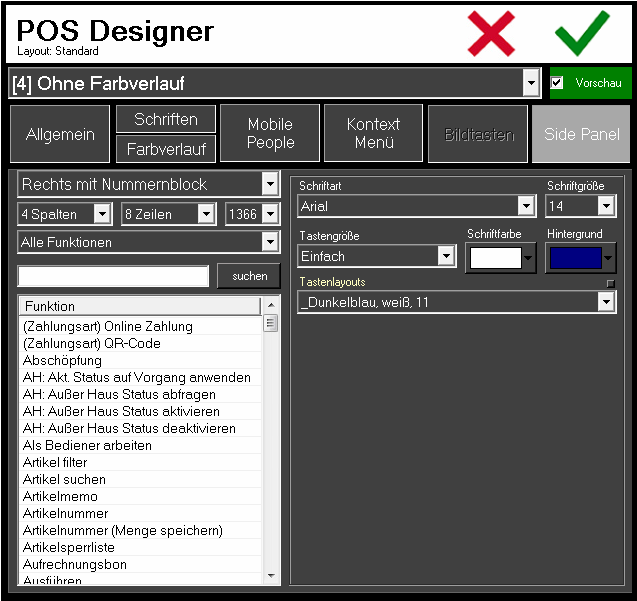
Select the desired type of side panel, left, right, with or without /number pad. Furthermore you can select different formats which should correspond to the respective hardware (up to 1920 pixels horizontally). You divide the side panel by the desired number of columns and rows.
The standard resolution of the cash register, without sidepanel is 1024x768, with sidepanel 1366x768.
Depending on the hardware, you can freely set the width of the side panel, the following resolutions are possible:
1024x768 - without sidepanel
1366x768 - with sidepanel (Hypersoft Standard)
1280x768 - with side panel
1440x768 - with side panel
1600x768 - with side panel
1920x768 - with sidepanel (see following figure)

Columns and rows can be set up to 16 each, resulting in up to 256 additional keys. In the left-hand list are cashier functions and in addition all groups, forms etc. are marked separately at the end of the list. The filter above All functions filters according to groups / prices / forms etc., i.e. everything that is not a cash register function, but is dynamically made available on the basis of the master data. Like this:

The list is therefore much clearer and a full text search is also available.
Functions from the left list are dragged directly with the mouse onto the button. The key is then assigned accordingly. Selected keys have a red border, the ESC key on your keyboard cancels the selection.

The function is also displayed in a list. To combine more than one function, i.e. to create a macro, you can add more functions to this list.

Additional functions can be added simply by "double-clicking" or dragging from the left to the right list. After 8 functions a warning appears in the list that the maximum has been reached.
The cash register functions can be easily removed by dragging from the right list to the left list.
The Execute as macro function is activated in the standard system. If you deactivate the switch, you get a list of functions from which you can select one.
Set fonts and colours...
Fonts and colors can be freely adjusted. If you choose a key layout (from the already known Hypersoft layouts) the colors and fonts are displayed, but the given layout of the keyboard is used. The selection of key layouts is given a yellow heading to indicate that a layout is active. If you change the color, size or font of this key, the selected layout will be deselected, so that the key has individual settings.
Use layout templates...
The small dot next to key layouts calls the layout dialog to customize layouts. Below the list on the right are copy functions in the variants Complete, Only colors and Font. If you press one of these buttons while the key is active, the button and the heading flash in red to indicate the active copy mode. Now you can transfer the layout of the selected key (framed in red) by pressing other keys. If you leave the keypad or press the X button, the copy mode is terminated.
Pictures and blind caps...
The button Pictures opens a gallery view like in the item master, so that you can put pictures on keys. In the key size setting, there is the Blind cap entry with which you can make individual keys invisible.
Advanced editing...
Right-clicking on a key opens a context menu for further commands:

All keys can also be moved freely by simply touching them (if you place a key on an already assigned key, it will be replaced).
Back to the overarching topic: Designing the keyboard layout