Wallet-Control POS Operator Exchange
Pressing the cash register function Wallet-Control Operator on the POS starts the change entry for the operator purse.
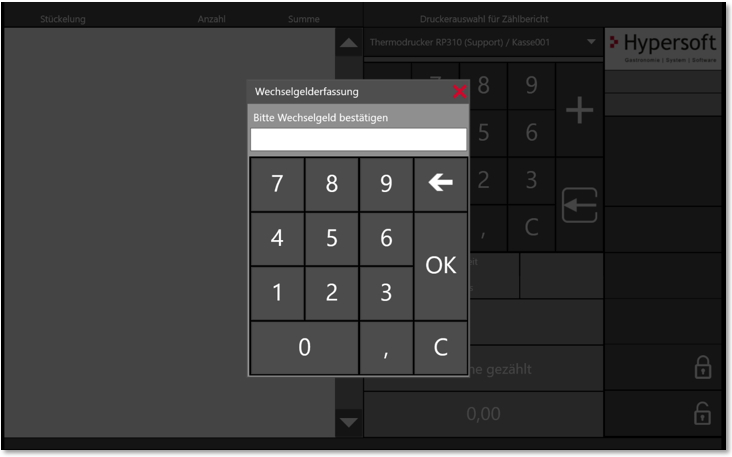
In the following dialogue, the change is entered as the starting balance for the operator's purse and then confirmed:

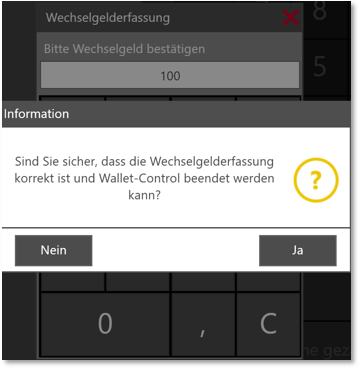
At this point, the entry can be corrected again or confirmed with Yes. In this case, the change is deposited in the operator's purse and the dialogue closes.
After creating the exchange, the following exchange receipt is printed.
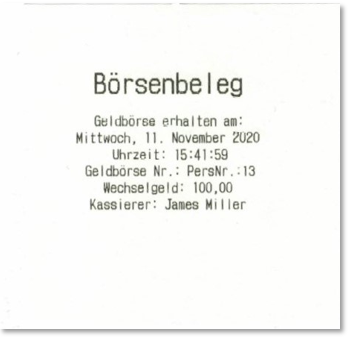
Subsequently, all cash and non-cash transactions as well as payments with foreign currencies carried out by the registered operator are assigned to this exchange. The assignment of the operator exchange is now complete.
End of shift detection
Once the bookings have been recorded, the operator's exchange can be settled. The stock exchange settlement of the existing operator stock exchange is started with the help of the cash register function Wallet-Control Operator or the cash register function Execute.
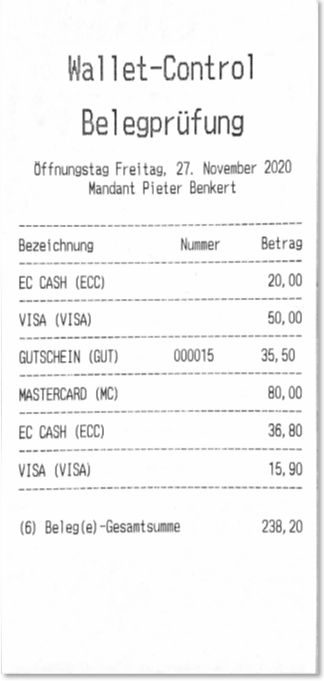
A dialogue for the first preliminary check of the receipts for non-cash payments and the change now appears.

The individual items are listed chronologically according to the order of the bookings in the POS system and can optionally be ticked off for better visual inspection of the respective items. In addition, the total amount as well as the change entered at the beginning is also displayed.

Foreign currencies...
Foreign currencies that are stored in the payment types and have been settled in at least one transaction are only displayed for information purposes in the preliminary check and in the count dialogue for the follow-up check.
In the following example, the /main currency would be Euro and the foreign currency CHF; in Switzerland, however, Euro would be the foreign currency:

The item list can be output with the printer symbol (the output takes place on the stored Front Office invoice printer).
After confirming with Next, the dialogue for recording and counting the cash values appears.
PC keyboard compatible...
The entry of the exchanges or cash drawer can also be done with the help of a PC keyboard. By pressing the enter key, you can change to the next line and enter the quantity of the note or coin type with the /number pad.
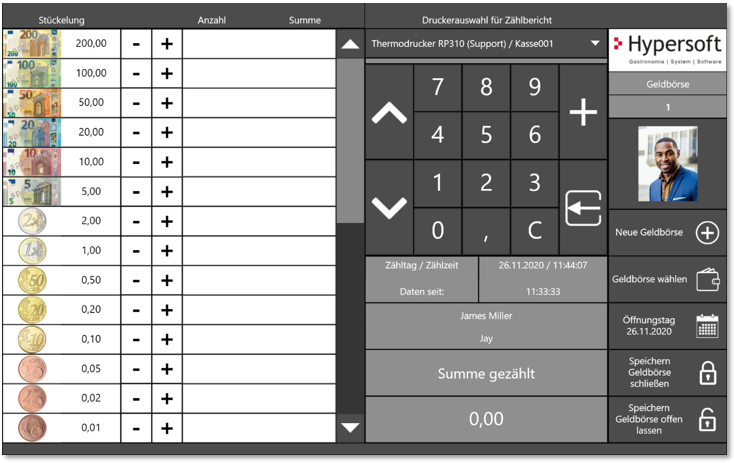
| Element / Switch | Function / Description |
|---|---|
| Table |
In the table, the revenues are recorded according to type. Alternatively, the entry can be specified as the sum. The notes and coins can be entered either via the + and - keys, input via external keyboard or via the number pad on the right side. It should be recorded by type, it is not appropriate to record 1.00 Euro * 350 pieces for a cash stock of 350, for example. Scrolling down takes you to more fields. Amounts for banknotes and coins as well as totals for card payments can still be entered here.
|
| Operator or loader | You will get the hint that it is a stock exchange. We recommend as in the ex. to store photos in the employee master so that the operator can see his here (otherwise a placeholder appears). |
| Open cash drawer | Allows the operator to open the cash drawer. |
|
New cash drawer/wallet and select |
Depending on the global system setting, they are given the option here to settle further purses. |
| Opening day *Date | Information |
| Save Close cash drawer | Does not refer to the physical closing of the wallet, but completes the capture entirely. |
| Save Leave cash drawer open |
Refers to the possibility of interrupting the capture and resuming it later. equivalent for the cash drawer. This option can be removed if required. |
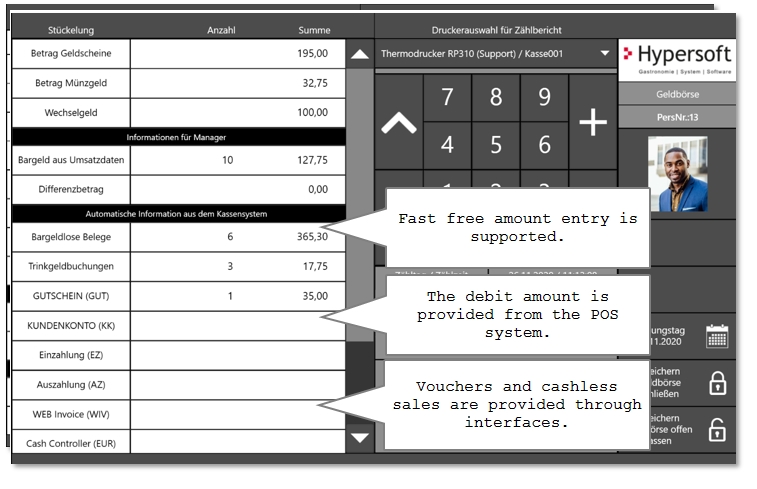
View of the operator variant...

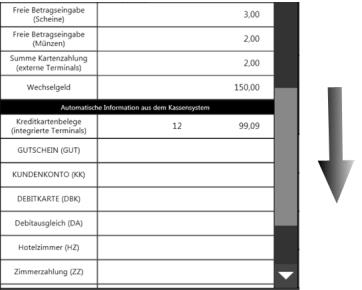
Scrolled down...
Verification of the entry to the actual booked stock
When saving, the system checks whether the recorded amount is exactly correct, too high or too low. If the recorded amount is too low or too high, the message below is displayed.

This message must be confirmed with OK. Afterwards, you return to the counting dialogue and can carry out a new count once. Regardless of whether this count is correct or incorrect, the following dialogue appears when you save and close the exchange again:
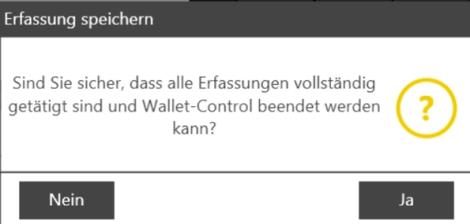
Here you can close the exchange via Yes. Clicking on No takes you back to the counting dialogue. At the end of the count, a Wallet Control count report is generated. This count report is printed in duplicate, once for the operator and once for the manager.

The switch is deactivated when an operator's statement is printed out; the report can then be printed out automatically when the operator's statement is printed out.
Back to the overarching topic: Wallet control at the POS