Hypersoft mPOS in practice
Like the POS system, the Hypersoft mPOS system works with an operator login. After logging in, the main menu appears with a selection of six possible functions. At the end of each function, the operator returns to this selection.
The mPOS Handheld Main Menu:

The main menu consists of six buttons.
1 Info
Messages are displayed to the operator here. The number indicates the number of messages.
2 Operation list
Leads directly to the opening of an existing operation. The number indicates the number of transactions already created. If none is available, you are redirected to the New function.
3 Quick Mode and Cam
Here you can activate the Quick Mode (hold for a long time) or the images of up to six cameras can be queried.
4 Open procedure/New
Enables you to create a new activity.
5 Unsubscribe
Immediately cancels the operator's session at the mPOS.
6 Simple
Allows the operator to order easily (without table number / transaction number). Personnel processes can also be booked (by holding for a long time).
Notes on updating...
This main menu is not updated automatically if it is not in use. The display of the number of open transactions and messages is updated when the main menu is displayed again, for example after posting or after New balance.
The display is adjusted in one-hand portrait format.
At start-up, the server, the device IP, the version and the serial number are displayed. As the process progresses, it is precisely communicated which data the device is currently downloading (employee data / images and the complete item master are stored on the device). For example, if the current item master already exists on the device, this is displayed with the corresponding text: Local item master.
During the start process, the date and time are displayed and both can be easily corrected. In addition, the corresponding IPs and version number as well as the serial number are displayed.


The dialog can also be used to write down the settings, etc., since the further program flow is suspended as long as the dialog is visible.
Battery status of the mPOS device
Working with a battery that is too weak can cause malfunctions, so replace the battery in good time.
A functioning charged battery is essential for working on the mPOS. Therefore the status is always checked. If the battery status falls below 20%, the word Battery is displayed with a red background, the battery should be replaced at the next opportunity. If the battery is weak, the word battery is highlighted in yellow.
Further topics: Battery and WLAN settings of the client
Commands, functions and options
By pressing and holding the button Operation list, you get a list of commands:

Further topics:
Change tip afterwards and payment method
mPOS has two other lists with which the user can perform special actions. These lists are called functions and options.
The scope of the display of these two areas depends on the existing licenses (plug-ins) and the operator authorizations.
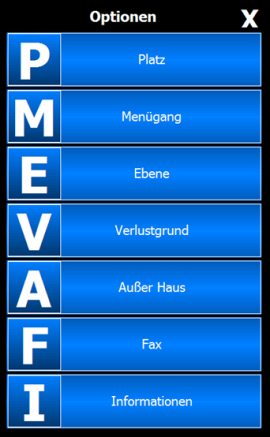
The options can be accessed in three ways: Touching the upper area of the CLOU Mobile programme will take you to the options at any time.

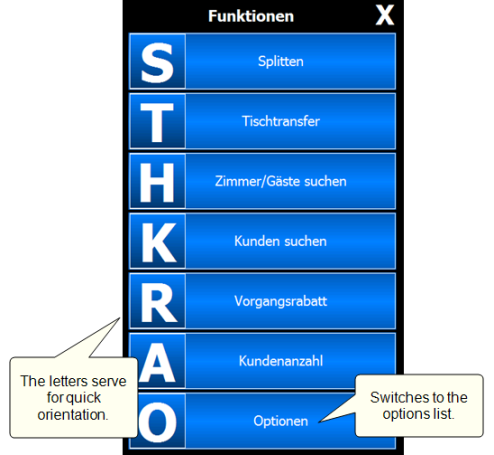
With a gesture to the left or the button Options you can switch from the function list to the options.
The options always refer to the items. (You can also select options from the Functions area).

Depending on the mode, the button A Outside house changes its label content to A Inside house - if outside house is currently active.
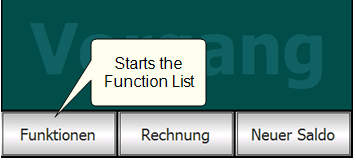
The function menu always refers to the operation. The functions can be accessed in two ways: They can be accessed directly using the Functions button (shown in certain screens below).
-
To use the item tags, see TAGs and features on the mPOS.
-
To use the pager assignment, see Pager query.

Or with a gesture to links you can switch between options and functions at any time.


The large letters in the menu are used for quick orientation on the CLOU Mobile. The number of functions depends on the authorizations.
Further topics: mPOS Information
mPOS Handheld Connection Service
If the network connection is interrupted, the mPOS connection service takes care of re-establishing the connection.
This message may appear in borderline areas of the WLAN, during unusually high workloads or in connection with exceptional circumstances. It should by no means occur frequently or even make your work more difficult. For minor deviations, you can set the mPOS timeout. If relevant waiting periods occur more frequently, you must have your WLAN requirements checked.

After the W-LAN interface has been re-established, this dialog closes automatically. In case of recurring connection problems, setting the timeouts to longer waiting times may help, if necessary.
The notice of the mPOS connection service differs visually between the CLOU Mobile for Windows and the mPOS system, as shown here in the mPOS example:

This notice comes from the Hypersoft connection service. If other messages appear, their source is the respective Windows operating system of the unit, so these messages must be dealt with there.
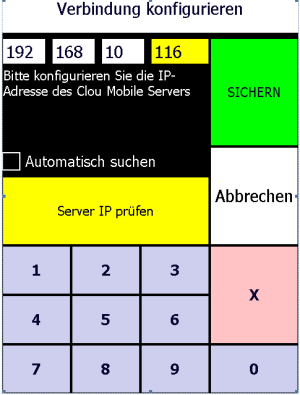
If no server IP is entered on the device yet, the following dialog opens automatically:

The IP can then be entered directly, or an entire range. A found or entered IP can be saved and the programme start is continued. All 4 fields can be changed. The first 3 are preset with the own IP range of the handset and at the 4th position the 100 is entered, because this is the most frequent ServerIP.
If the setup has already been carried out on the unit, no USB connection is required.
Further topics: Start mPOS Handheld
The X icon closes the dialog, but then causes the subsequent call to the server to fail and you see this dialog again (up to 3 times) before the original error message is displayed. If no network is available when the mPOS is started, the programme is terminated immediately by pressing X.
Further topics:
Back to the overarching topic: Hypersoft mPOS